
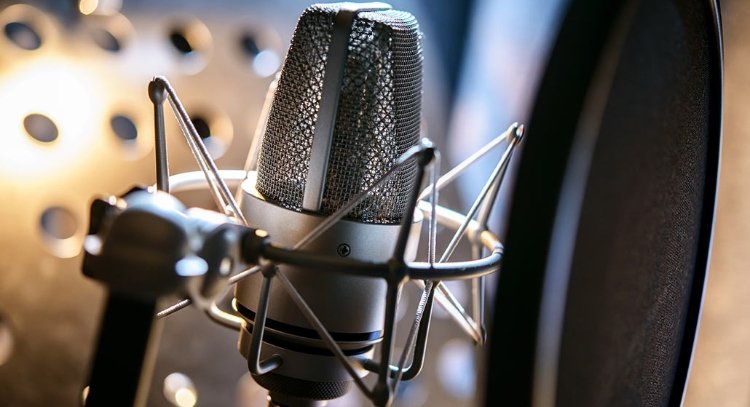
A voice acting microphone is one of the most important tools for actors, narrators, audiobook creators, animation performers, voice-over artists, and content creators. A good microphone can capture speech with clarity, detail, consistency, and a natural tone, allowing the performance to sound professional and engaging.
Choosing the right microphone is not simply about buying the most expensive model. The best option depends on the actor’s voice, recording environment, microphone technique, room acoustics, and the type of work being recorded. Professional microphone guidance also emphasizes that there is no single microphone that works perfectly for every voice or application.
Whether you are building a professional recording booth or starting a home voice-over setup, understanding microphone types and recording techniques can help you make a better decision.
What Is a Voice Acting Microphone?
A voice acting microphone is a microphone designed or selected for recording spoken performances with clarity and detail. Voice actors use microphones for animation, video games, commercials, films, television, audiobooks, e-learning, podcasts, dubbing, narration, and other professional projects.
The microphone needs to capture subtle changes in tone, emotion, pronunciation, volume, and character. For this reason, voice actors often choose studio-quality microphones rather than basic computer microphones.
A high-quality studio microphone can provide a fuller and more authoritative sound for voice-over work, although both condenser and dynamic microphones can be appropriate depending on the performer’s voice and recording environment.
Why Is a Good Voice Acting Microphone Important?
Voice acting is different from casual speaking. A professional performance may involve whispers, loud dialogue, emotional scenes, character voices, dramatic changes in volume, and subtle changes in expression.
A suitable microphone should therefore provide:
- Clear speech reproduction
- Consistent frequency response
- Low unwanted noise
- Good sensitivity
- Suitable directionality
- Reliable performance
- Compatibility with the recording setup
The microphone also needs to work well with the actor’s individual voice. A microphone that sounds excellent with one performer may not produce the same result with another. Shure’s current vocal-recording guidance specifically notes that microphone choice should complement the vocalist rather than simply being based on price.
Condenser vs Dynamic Voice Acting Microphone
The two most common microphone categories to consider for voice acting are condenser and dynamic microphones.
| Feature | Condenser Microphone | Dynamic Microphone |
|---|---|---|
| Sensitivity | Higher | Lower |
| Detail | Excellent | Good to excellent |
| Room noise | Can capture more | Generally captures less |
| Studio use | Very common | Increasingly popular |
| Untreated room | Can be challenging | Often more forgiving |
| Voice-over | Excellent | Excellent for suitable voices |
| Interface | Usually required for XLR | Usually required for XLR |
| Best environment | Quiet, treated room | Noisy or less-treated room |
Large-diaphragm condenser microphones are widely used for studio vocals because of their detailed sound and frequency response. However, dynamic microphones can be preferable for some voices and recording environments.
Condenser Microphones for Voice Acting
A condenser microphone is often considered a strong choice for professional voice acting because it can capture subtle vocal details.
Condenser microphones can be particularly useful for:
- Animation
- Audiobooks
- Commercial voice-over
- Character performances
- Narration
- E-learning
- Studio dubbing
- Film voice-over
Their sensitivity can capture quiet details and changes in vocal expression. However, the same sensitivity can also capture unwanted room reflections, computer fans, traffic, air conditioning, and other background sounds.
Therefore, a condenser microphone usually performs best in a quiet and acoustically controlled recording space.
Dynamic Microphones for Voice Acting
Dynamic microphones can also be excellent voice acting microphones, particularly when recording in an imperfect home environment.
Dynamic microphones generally have lower sensitivity and can reject more unwanted room sound than highly sensitive condenser microphones. RØDE’s current microphone guidance describes dynamic microphones as useful for rejecting unwanted background noise, while recommending condenser microphones for detailed studio recording and voice-over applications.
A dynamic microphone may be a good choice if:
- Your room is not professionally treated.
- There is background noise.
- Your voice is naturally bright or aggressive.
- You prefer a focused broadcast-style sound.
- You record close to the microphone.
However, a dynamic microphone may require more gain from the audio interface or preamp.
What Polar Pattern Is Best for Voice Acting?
Polar pattern describes the directions from which a microphone picks up sound.
For many voice acting applications, a cardioid microphone is a practical choice because it focuses primarily on sound coming from the front while reducing sound from the rear.
| Polar Pattern | Pickup Characteristics | Voice Acting Use |
|---|---|---|
| Cardioid | Mainly front | Excellent general choice |
| Supercardioid | Narrower front pickup | Useful for noise rejection |
| Omnidirectional | All directions | Specialized environments |
| Figure-8 | Front and rear | Advanced recording techniques |
| Multi-pattern | Several pickup modes | Flexible professional studios |
Understanding directionality is important because microphone placement can help capture the intended voice while reducing unwanted background sound.
Best Microphone Distance for Voice Acting
Microphone distance has a major effect on recorded speech.
A professional audio guide recommends starting around 6–8 inches from the mouth for voice-over work, then adjusting the position based on the voice and microphone.
Another important principle is consistency. Moving significantly closer or farther from the microphone during a performance can change volume, tone, and proximity effect.
For voice acting, experiment with the distance and find a position that provides:
- Clear speech
- Consistent volume
- Controlled bass
- Minimal plosives
- Comfortable performance
Use a Pop Filter
A pop filter is a useful accessory for a voice acting microphone.
Strong bursts of air from sounds such as “P” and “B” can create unwanted low-frequency noises called plosives. A pop filter helps reduce these bursts before they reach the microphone.
Shure recommends using a pop filter when recording vocals with a condenser microphone to help control plosive sounds.
A pop filter is especially useful for:
- Voice-over
- Animation
- Audiobooks
- Commercials
- Narration
- Singing
- Character acting
Voice Acting Microphone and Room Acoustics
One of the biggest mistakes new voice actors make is focusing entirely on the microphone while ignoring the recording environment.
Even an expensive microphone can produce an unprofessional recording if the room has excessive reflections.
Hard walls, windows, floors, ceilings, and furniture can reflect sound toward the microphone. These reflections can create an echo or “roomy” quality.
A better recording environment can include:
- Acoustic panels
- Heavy curtains
- Rugs
- Soft furnishings
- Bookshelves
- Proper microphone positioning
- Reduced background noise
Room treatment is not the same as soundproofing. Acoustic treatment helps control reflections inside the room, while soundproofing attempts to prevent sound from entering or leaving the space.
Voice Acting Microphone for a Home Studio
You do not need a large professional studio to begin voice acting.
A basic home voice-over setup can include a microphone, stand, pop filter, headphones, audio interface, computer, and recording software.
| Equipment | Purpose |
|---|---|
| Voice acting microphone | Captures the performance |
| Microphone stand | Keeps microphone stable |
| Pop filter | Reduces plosives |
| Audio interface | Connects an XLR microphone |
| Headphones | Monitors recording |
| Computer | Stores and processes audio |
| Recording software | Records and edits performance |
| Acoustic treatment | Controls room reflections |
The quality of the room should be considered alongside microphone quality. A less expensive microphone in a controlled environment can sometimes produce a better recording than a premium microphone in a noisy, reflective room.
USB vs XLR Voice Acting Microphone
Voice actors can choose between USB and XLR microphones.
A USB microphone connects directly to a compatible computer, making it convenient for beginners. An XLR microphone requires an audio interface but provides a more traditional professional recording workflow.
| Feature | USB | XLR |
|---|---|---|
| Setup | Very easy | Requires interface |
| Beginner friendly | Excellent | Good |
| Expansion | Limited | Excellent |
| Multiple microphones | Less flexible | Highly flexible |
| Professional studio workflow | Limited | Excellent |
| Audio interface | Not normally required | Required |
For someone just starting, USB can be convenient. For a voice actor planning professional work and future upgrades, an XLR setup can provide greater flexibility.
Voice Acting Microphone for Beginners
Beginners should not feel pressured to purchase the most expensive microphone available.
Start by considering the recording environment and type of voice acting you want to perform.
For example:
Animation and character acting: A detailed condenser microphone can work well in a quiet room.
Audiobooks: Choose a microphone that produces natural and consistent speech over long recording sessions.
Commercial voice-over: A clear and polished microphone can help capture an energetic presentation.
Home recording: A dynamic microphone may be useful if the room contains significant background noise.
Professional booth: A quality large-diaphragm condenser can be an excellent option when the room is acoustically controlled.
Voice Acting Microphone for Different Voices
Every voice is different.
A deep voice may sound overly boomy on a microphone with strong low-frequency emphasis. A naturally bright voice may sound harsh through a microphone that strongly emphasizes high frequencies.
This is why microphone selection should be based on the combination of microphone and performer.
Shure’s recording guidance notes that two microphones with different tonal characteristics can be useful because one may complement a particular voice better than another.
Before buying a microphone, if possible, listen to recordings of your own voice through different microphone types.
Voice Acting Microphone for Animation
Animation voice acting often involves exaggerated expressions, character voices, whispers, shouting, laughter, and rapid changes in vocal energy.
The microphone should therefore handle a wide range of vocal dynamics without introducing excessive distortion.
A good recording setup should also provide enough space for the actor to move naturally while maintaining relatively consistent microphone distance.
For very energetic performances, microphone placement may need to be adjusted to reduce sudden volume changes and plosive sounds.
Voice Acting Microphone for Audiobooks
Audiobook recording requires consistency because actors may record for several hours at a time.
A suitable audiobook microphone should capture speech naturally without excessive room noise or harshness.
Consistency is particularly important because listeners may hear the same narrator across many chapters.
Use a stable microphone position, maintain consistent distance, monitor recording levels, and keep the recording environment as quiet as possible.
Voice Acting Microphone for Gaming and Character Voices
Video game voice acting can place unusual demands on microphones.
A performer may need to create:
- Normal dialogue
- Shouting
- Whispering
- Breathing
- Creature sounds
- Emotional performances
- Combat dialogue
- Dramatic reactions
A microphone with good detail and suitable dynamic handling can help capture these performances.
The recording space should also be quiet enough that background noise does not become noticeable when the actor changes volume.
How to Set Up a Voice Acting Microphone
Follow these basic steps to create a reliable recording setup.
Step 1: Choose a quiet room
Reduce outside noise and switch off unnecessary sources of noise.
Step 2: Treat the room
Use acoustic treatment or soft furnishings to reduce excessive reflections.
Step 3: Mount the microphone
Place the microphone securely on a stand or boom arm.
Step 4: Add a pop filter
Position the pop filter between your mouth and the microphone.
Step 5: Set microphone distance
Start around 6–8 inches away and adjust according to your voice and microphone.
Step 6: Adjust gain
Speak at your normal performance level and make sure the recording does not clip.
Step 7: Record a test
Listen carefully for echo, background noise, plosives, excessive bass, or harshness.
Step 8: Maintain consistency
Keep your position and performance distance relatively stable throughout the recording.
Common Voice Acting Microphone Mistakes
Many beginners make avoidable mistakes.
Recording in a noisy room: Even an excellent microphone cannot completely remove unwanted background noise.
Speaking too close: Extremely close positioning can increase bass and plosive problems.
Speaking too far away: Excessive distance can increase room sound and reduce vocal clarity.
Ignoring microphone angle: Small changes in angle can affect tone and sibilance.
Using excessive processing: Heavy noise reduction, compression, or equalization can make dialogue sound unnatural.
Buying equipment without testing your voice: A microphone should complement your voice rather than simply having a high price.
How to Choose the Best Voice Acting Microphone
Before buying, consider these factors:
| Factor | What to Consider |
|---|---|
| Microphone type | Condenser or dynamic |
| Recording environment | Treated or untreated |
| Connection | USB or XLR |
| Polar pattern | Cardioid is a common starting point |
| Voice type | Deep, bright, soft or powerful |
| Recording purpose | Animation, audiobook, commercial, gaming |
| Accessories | Stand, pop filter, shock mount |
| Budget | Complete setup cost, not microphone alone |
The most important factor is not the brand name. The microphone should suit your voice, room, recording style, and intended work.
Frequently Asked Questions
What is the best voice acting microphone?
There is no single microphone that is best for every voice actor. A suitable condenser microphone can work very well in a treated studio, while a dynamic microphone may be more forgiving in a noisy or untreated room.
Is a condenser microphone good for voice acting?
Yes. Condenser microphones are commonly used for detailed studio voice recording and voice-over work.
Is a dynamic microphone good for voice acting?
Yes. Dynamic microphones can be excellent for voice acting, especially when background noise or room reflections are a concern.
Do voice actors need an audio interface?
An audio interface is normally needed when using an XLR microphone. USB microphones generally connect directly to a compatible computer.
How far should a voice actor sit from the microphone?
A useful starting point is around 6–8 inches from the microphone, although the ideal distance depends on the microphone, voice, room, and performance.
Do I need a pop filter for voice acting?
A pop filter is strongly recommended for many voice recording setups because it helps reduce plosive sounds caused by bursts of air.
Can I use a voice acting microphone in an untreated room?
Yes, but microphone choice becomes more important. A less sensitive dynamic microphone may be more forgiving of room noise and reflections than a highly sensitive condenser microphone.
Is an expensive microphone necessary for professional voice acting?
Not necessarily. The microphone should complement your voice and recording environment. Room acoustics, microphone technique, positioning, and recording quality are also important.
Conclusion
Choosing the right voice acting microphone is an important step toward creating professional-quality voice recordings. However, the microphone is only one part of the complete recording system.
A good voice actor should also pay attention to room acoustics, microphone distance, microphone angle, recording levels, pop-filter placement, headphones, and performance consistency.
For a quiet and acoustically controlled studio, a detailed condenser microphone can be an excellent choice. For a less controlled environment, a dynamic microphone may provide a more focused recording with less room sound. Current microphone guidance from major manufacturers similarly emphasizes matching microphone type and directionality to the recording environment and application.
The best voice acting microphone is ultimately the one that works naturally with your voice, your room, and your type of performance. Instead of choosing equipment based only on price, focus on building a complete recording setup that allows your performance to sound clear, natural, and professional.